
LiDAR sensor product families are easiest to evaluate when the reader starts from the real work problem. 905nm vs 1550nm LiDAR is not a simple contest where one wavelength is always better. The right answer depends on laser safety design, detector choice, optical filtering, target reflectivity, weather, packaging, cost structure and the decision the machine must make. A useful comparison tests the complete sensor system under the same real scene conditions.
The quick answer is that 905nm vs 1550nm LiDAR should be selected around the physical scene, not around a single maximum number. The sensor must cover the target, produce data the software can use, and support the response the machine needs to take.

For related internal planning, compare this requirement with automotive LiDAR applications, 3D LiDAR sensor options, and the broader LidarStar LiDAR catalog. These references keep the discussion tied to practical deployment choices.
Wavelength is a system decision, not a winner-takes-all choice: what to check
The useful 905nm vs 1550nm LiDAR question starts with the job: distance, target type, operating environment, packaging, safety documentation and integration constraints. For 905nm vs 1550nm LiDAR, this question should be tied to a defined target, distance, viewpoint and decision. Otherwise, a technically correct measurement can still be irrelevant to the application.
Write the application boundary first, then compare wavelengths against the same targets and same mounting location. Change one variable at a time, keep raw or minimally processed data, and record the exact configuration. The goal is a result another engineer can reproduce rather than a one-time demonstration.
Avoid treating wavelength as a shortcut for quality because receiver design, optics and software still decide the field result. Use FDA laser product safety information as an independent reference while defining terminology, assumptions, or test evidence.
Eye safety and power budgets must be read with the full design: what to check
Laser safety depends on emitted energy, wavelength, exposure pattern, classification method and product design, not on a single line in a brochure. For 905nm vs 1550nm LiDAR, this question should be tied to a defined target, distance, viewpoint and decision. Otherwise, a technically correct measurement can still be irrelevant to the application.
Review the supplier safety documentation and test the complete assembly, including covers or windows that sit in front of the sensor. Change one variable at a time, keep raw or minimally processed data, and record the exact configuration. The goal is a result another engineer can reproduce rather than a one-time demonstration.
Keep safety assumptions separate from performance claims so engineering and compliance reviews stay clear. Use NIST laser-scanner ranging tests as an independent reference while defining terminology, assumptions, or test evidence.
| Decision area | Practical question | Evidence to save |
|---|---|---|
| Coverage | Does the field of view include the real target? | Photos, scan captures, and route notes |
| Timing | Can the controller act soon enough? | Timestamps and behavior logs |
| Environment | Do lighting, dust, vibration, or surfaces change results? | Difficult-scene examples |
| Integration | Can software use the output directly? | Driver, frame, and message checks |
| Maintenance | Can the site keep it aligned and clean? | Service access review |
Detector material and optical path affect cost, packaging and noise: what to check
A wavelength choice can change detector materials, optical filters, thermal behavior, window selection, power use and the shape of the receiver chain. For 905nm vs 1550nm LiDAR, this question should be tied to a defined target, distance, viewpoint and decision. Otherwise, a technically correct measurement can still be irrelevant to the application.
Inspect the production enclosure, cable route and heat path before judging a bench sensor. Change one variable at a time, keep raw or minimally processed data, and record the exact configuration. The goal is a result another engineer can reproduce rather than a one-time demonstration.
Record power, temperature and diagnostic behavior during a representative duty cycle. Use NHTSA weather effects on LiDAR sensors report as an independent reference while defining terminology, assumptions, or test evidence.
Range claims need target reflectivity and test conditions: what to check
A long range number is only meaningful when target reflectivity, target size, incidence angle, ambient light and detection criteria are stated. For 905nm vs 1550nm LiDAR, this question should be tied to a defined target, distance, viewpoint and decision. Otherwise, a technically correct measurement can still be irrelevant to the application.
Place dark, mid-tone and bright targets at surveyed distances, then run both candidates through the same route. Change one variable at a time, keep raw or minimally processed data, and record the exact configuration. The goal is a result another engineer can reproduce rather than a one-time demonstration.
Measure repeatable detection and track stability instead of the farthest isolated return. Use neutral LiDAR technology overview as an independent reference while defining terminology, assumptions, or test evidence.
Weather, sunlight and window material can change the comparison: what to check
Rain, fog, low sun, dust and contaminated covers can reduce useful margin in ways that a clean lab test will not show. For 905nm vs 1550nm LiDAR, this question should be tied to a defined target, distance, viewpoint and decision. Otherwise, a technically correct measurement can still be irrelevant to the application.
Repeat the same targets under documented lighting and spray conditions without retuning between runs. Change one variable at a time, keep raw or minimally processed data, and record the exact configuration. The goal is a result another engineer can reproduce rather than a one-time demonstration.
Define degraded behavior before the system reaches an uncertain state. Use NIST laser scanner calibration experiments as an independent reference while defining terminology, assumptions, or test evidence.
A practical wavelength evaluation plan: what to check
A practical comparison should end with a short evidence package: test targets, mounting, environmental notes, raw data, processed outputs and the final machine response. For 905nm vs 1550nm LiDAR, this question should be tied to a defined target, distance, viewpoint and decision. Otherwise, a technically correct measurement can still be irrelevant to the application.
Use the same pass criteria for both wavelength options and include a negative case that should not trigger action. Change one variable at a time, keep raw or minimally processed data, and record the exact configuration. The goal is a result another engineer can reproduce rather than a one-time demonstration.
Choose the wavelength that supports the application with repeatable margin, maintainable packaging and clear documentation. Invite operators and maintenance staff to review the result because they see workflow and service conditions that a bench test misses.
A field scenario that exposes the weak point
Imagine the first pilot for 905nm vs 1550nm LiDAR looks convincing during a calm demonstration. The expected target is visible, the visualization is clean, and the operator sees the intended event. The scene changes during normal work: laser safety depends on emitted energy, wavelength, exposure pattern, classification method and product design, not on a single line in a brochure. At the same time, mounting, timing, background conditions, or processing removes some of the margin that existed during the demonstration. The system still produces data, but the decision arrives late, becomes unstable, or creates an unnecessary alert.
The useful response is not to change several filters at once. Recreate the difficult scene at reduced operational risk, preserve the original configuration, and follow this test: Review the supplier safety documentation and test the complete assembly, including covers or windows that sit in front of the sensor. Then repeat with one controlled change and compare raw measurements, interpreted output, and final behavior on the same timeline. This reveals whether the limiting step is sensing, geometry, software, integration, or the acceptance rule itself.
Close the investigation with an operator-visible criterion. Keep safety assumptions separate from performance claims so engineering and compliance reviews stay clear. Record the target, distance, direction, environmental state, software version, first reliable detection, and the action that followed. Keep one failed run beside the passing run. That pair is more useful for future maintenance than a polished final screenshot because it shows exactly which boundary the installation must continue to respect.
Pilot evidence before selection
For a later-stage project review, compare the article guidance with LiDAR sensor product families, then keep the measurement assumptions close to neutral LiDAR technology overview and NIST laser scanner ranging tests. This keeps 905nm vs 1550nm LiDAR: Wavelength Tradeoffs Explained tied to repeatable evidence rather than a single attractive demonstration.
When the application involves robots, vehicles, or moving equipment, review robotics LiDAR applications and OSHA robotics safety overview together. For teams using ROS data, ROS 2 LaserScan message definition and ROS PointCloud2 message definition are useful references for checking whether the output format matches the software contract.
Before the final shortlist, compare the physical environment against industrial automation LiDAR deployments. If timing, frames, or collision behavior matter, save notes beside ROS 2 tf2 transform documentation and Nav2 collision monitor documentation so another engineer can repeat the same check later.
For purchasing or scaling decisions, connect the final requirement back to request a LiDAR application recommendation. Safety, compliance, and training notes can be checked against ISO 3691-4 driverless industrial truck safety standard, while the supporting video reference related LiDAR application video gives the team a quick visual reminder of practical LiDAR behavior.
For outdoor, public, or high-reflectivity scenes, keep NIST laser scanner calibration experiments, NOAA LiDAR measurement overview, and FDA laser product safety information with the project notes. Those references help the next reviewer understand calibration, measurement context, and laser-safety assumptions.
A pilot for 905nm vs 1550nm LiDAR should be written like an engineering record. Record the test location, sensor height, mounting angle, route or scene boundary, object size, lighting, surface condition, software version, and the exact behavior expected from the system. The notes should be factual enough that another engineer can repeat the test without guessing what the first team meant.
Collect three layers of evidence. The first layer is raw or minimally processed sensor data. The second layer is the interpreted result, such as an object, track, zone event, depth map, or filtered cloud. The third layer is the actual behavior that followed, such as a stop, warning, route update, measurement, or message. When those layers are saved together, the team can identify whether a problem came from sensing, processing, or decision logic.
Start with a calm baseline, then add ordinary difficulty one variable at a time. Run the same scene with a normal target, a dark target, an angled target, a small target, and a partially hidden target. If the system changes behavior, the team can see which condition caused the change. This slower rhythm usually saves time because it avoids a confusing pile of uncontrolled test results.
The pilot should also include a negative case that should not trigger action. That may be an object outside the route, a person standing in a safe area, a pallet behind a boundary, or motion that is moving away from the machine. Negative cases reveal whether the setup is selective or merely active. A dependable deployment needs both reliable detection and calm behavior when nothing important is happening.
Use real site timing. A sensor that looks stable while the machine is parked may not support the same behavior when a robot is turning, a conveyor is moving, or a vehicle is crossing the monitored zone. Save timestamps and controller responses, not only screenshots. Timing evidence is often what separates a promising demonstration from a system that can be trusted in daily work.
Common mistakes that hide weakness
The first mistake is testing only ideal scenes. Real deployments include dark objects, angled surfaces, temporary clutter, vibration, cleaning residue, glare, partial occlusion, and people working in unpredictable ways. Include the difficult cases early, because those cases decide whether the application can scale.
The second mistake is comparing a single headline number. Range, field of view, angular detail, frame rate, interface, environmental fit, output format, mounting, and support all matter. Their importance changes by application, so the comparison matrix should be built from the job rather than from a generic specification list.
The third mistake is deleting failure examples after the setup improves. Keep the missed object, false return, unstable track, delayed response, or poor mounting example. Those files explain why a later choice was made and help support staff recognize symptoms when the site changes. A clean final report without negative evidence is less useful than a practical record that shows the limits clearly.
The fourth mistake is reviewing only the engineering view. Operators know where people pause, where pallets are staged temporarily, which aisles become crowded, and which maintenance routines happen under time pressure. Their observations can change the sensor position, cable route, cleaning plan, or alert logic before the system becomes expensive to modify.
Another subtle mistake is ignoring the data contract. The receiving software must know the units, coordinate frame, timestamp behavior, confidence fields, and reset behavior. Clear data contracts prevent a good sensor from becoming an unreliable system because downstream code interpreted the output differently than the integration team expected.
Buying checklist
Before choosing hardware for 905nm vs 1550nm LiDAR, review the planned sensor position, required coverage, smallest target, dark-object behavior, required update timing, controller interface, environment, and service routine. If any item is unknown, run a small test before ordering hardware for multiple locations.
Ask for output examples in the format your software will use. A polished viewer is helpful for discussion, but the production system may need a scan topic, point cloud, object list, zone event, depth frame, or velocity field. Confirm driver availability, timestamp behavior, coordinate frames, configuration files, and recovery steps before treating the sensor as integration-ready.
Finally, review maintenance before purchase. The window must be reachable for cleaning, the bracket should resist vibration, the cable route should avoid strain, and the reset procedure should be clear to people who did not build the pilot. A technically strong sensor that is hard to maintain will lose reliability after installation.
Handoff notes for the next engineer
The handoff package for 905nm vs 1550nm LiDAR should include the final sensor position, mounting photos, cable route, host computer, interface settings, frame names, filter parameters, saved examples, and the reason important choices were made. It should also state the known limits plainly. The next engineer needs to know what was proven, what was rejected, and what still needs a longer trial.
Do not rely on memory for calibration or configuration. Save the files, screenshots, logs, and version notes beside the article or project record. If the sensor is moved, replaced, cleaned, or connected to a different controller, the team should have a repeatable check that confirms the system still sees the same targets in the same way.
A final readiness review should separate proven behavior from promising behavior. Proven behavior has repeated evidence under the expected scene conditions. Promising behavior has worked in a limited test but still needs more hours, weather, traffic, shifts, surfaces, or maintenance cycles. This distinction helps teams scale carefully without slowing down projects that already have enough evidence.
Write the acceptance test in plain language before the final run. State what target must be detected, where it will be placed, how fast the machine or object will move, what output is expected, and what response should follow. A pass should be observable by both the engineer and the site owner. If the pass condition cannot be written clearly, the project definition is not ready for a purchase decision.
Keep the acceptance test small enough to repeat after installation. A five-minute check that operators can run after cleaning, relocation, or software updates is often more valuable than a complex test that no one repeats. Repeatable checks protect the original sensor decision after the system leaves the pilot bench and make future maintenance decisions easier for every site team.
When the project is ready for a shortlist, review vehicle perception solutions and share the site details through request a LiDAR wavelength recommendation. A specific request produces a better recommendation than a broad sensor comparison.
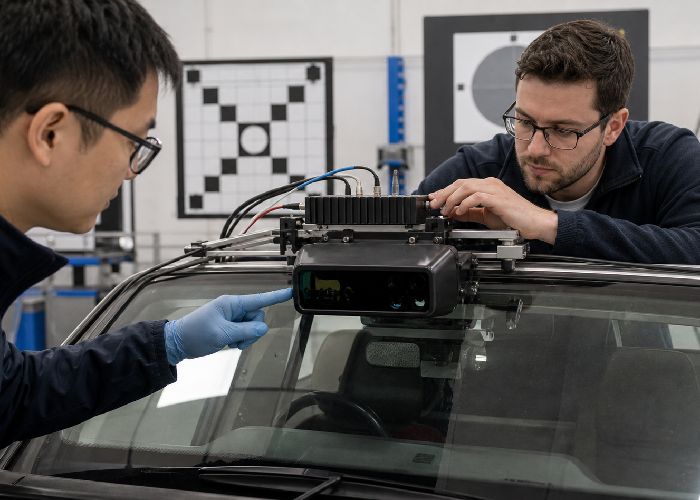
Before the final decision, repeat the most difficult 905nm vs 1550nm LiDAR test with the production mounting, production power supply, and production software configuration. A bench result is useful, but it does not include the vibration, cable routing, timing, contamination, or occlusion that appears on the finished machine.
Have someone who did not build the pilot run the short acceptance check. If that person cannot identify a pass, a failure, and the correct recovery step from the written instructions, the handoff is incomplete. This review catches assumptions that the original engineering team may no longer notice.
Record the final limits beside the successful results. State which target sizes, materials, angles, weather conditions, speeds, and mounting positions were tested, and which were not. Honest boundaries make future changes safer and give procurement a defensible basis for scaling the installation.
Conclusion
905nm vs 1550nm LiDAR should be chosen from the job it must perform, the evidence it can produce, and the behavior the machine needs to take. Start with the real scene, test difficult objects, keep raw and processed data, and compare sensors against the deployment conditions. That approach turns 905nm vs 1550nm LiDAR from a promising specification into a practical engineering decision.
FAQ
What is the most important first step for 905nm vs 1550nm LiDAR?
Define the physical job and the decision the system must support before comparing specifications.
How should a team validate performance?
Use real objects, real mounting positions, real speed, and saved evidence from both successful and difficult runs.
Can one sensor solve every application?
No. The right choice depends on range, field of view, target size, environment, software output, and maintenance needs.
What information helps with sensor selection?
Scene photos, target dimensions, mounting limits, interface needs, environment notes, and expected machine behavior are the most useful details.
Why keep failed test examples?
Failure examples show limits clearly and prevent future teams from repeating the same mounting, filtering, or integration mistake.